I often get asked about my painting process and so thought I would pick one of my recently competed paintings and provide details on the inspiration and the method.
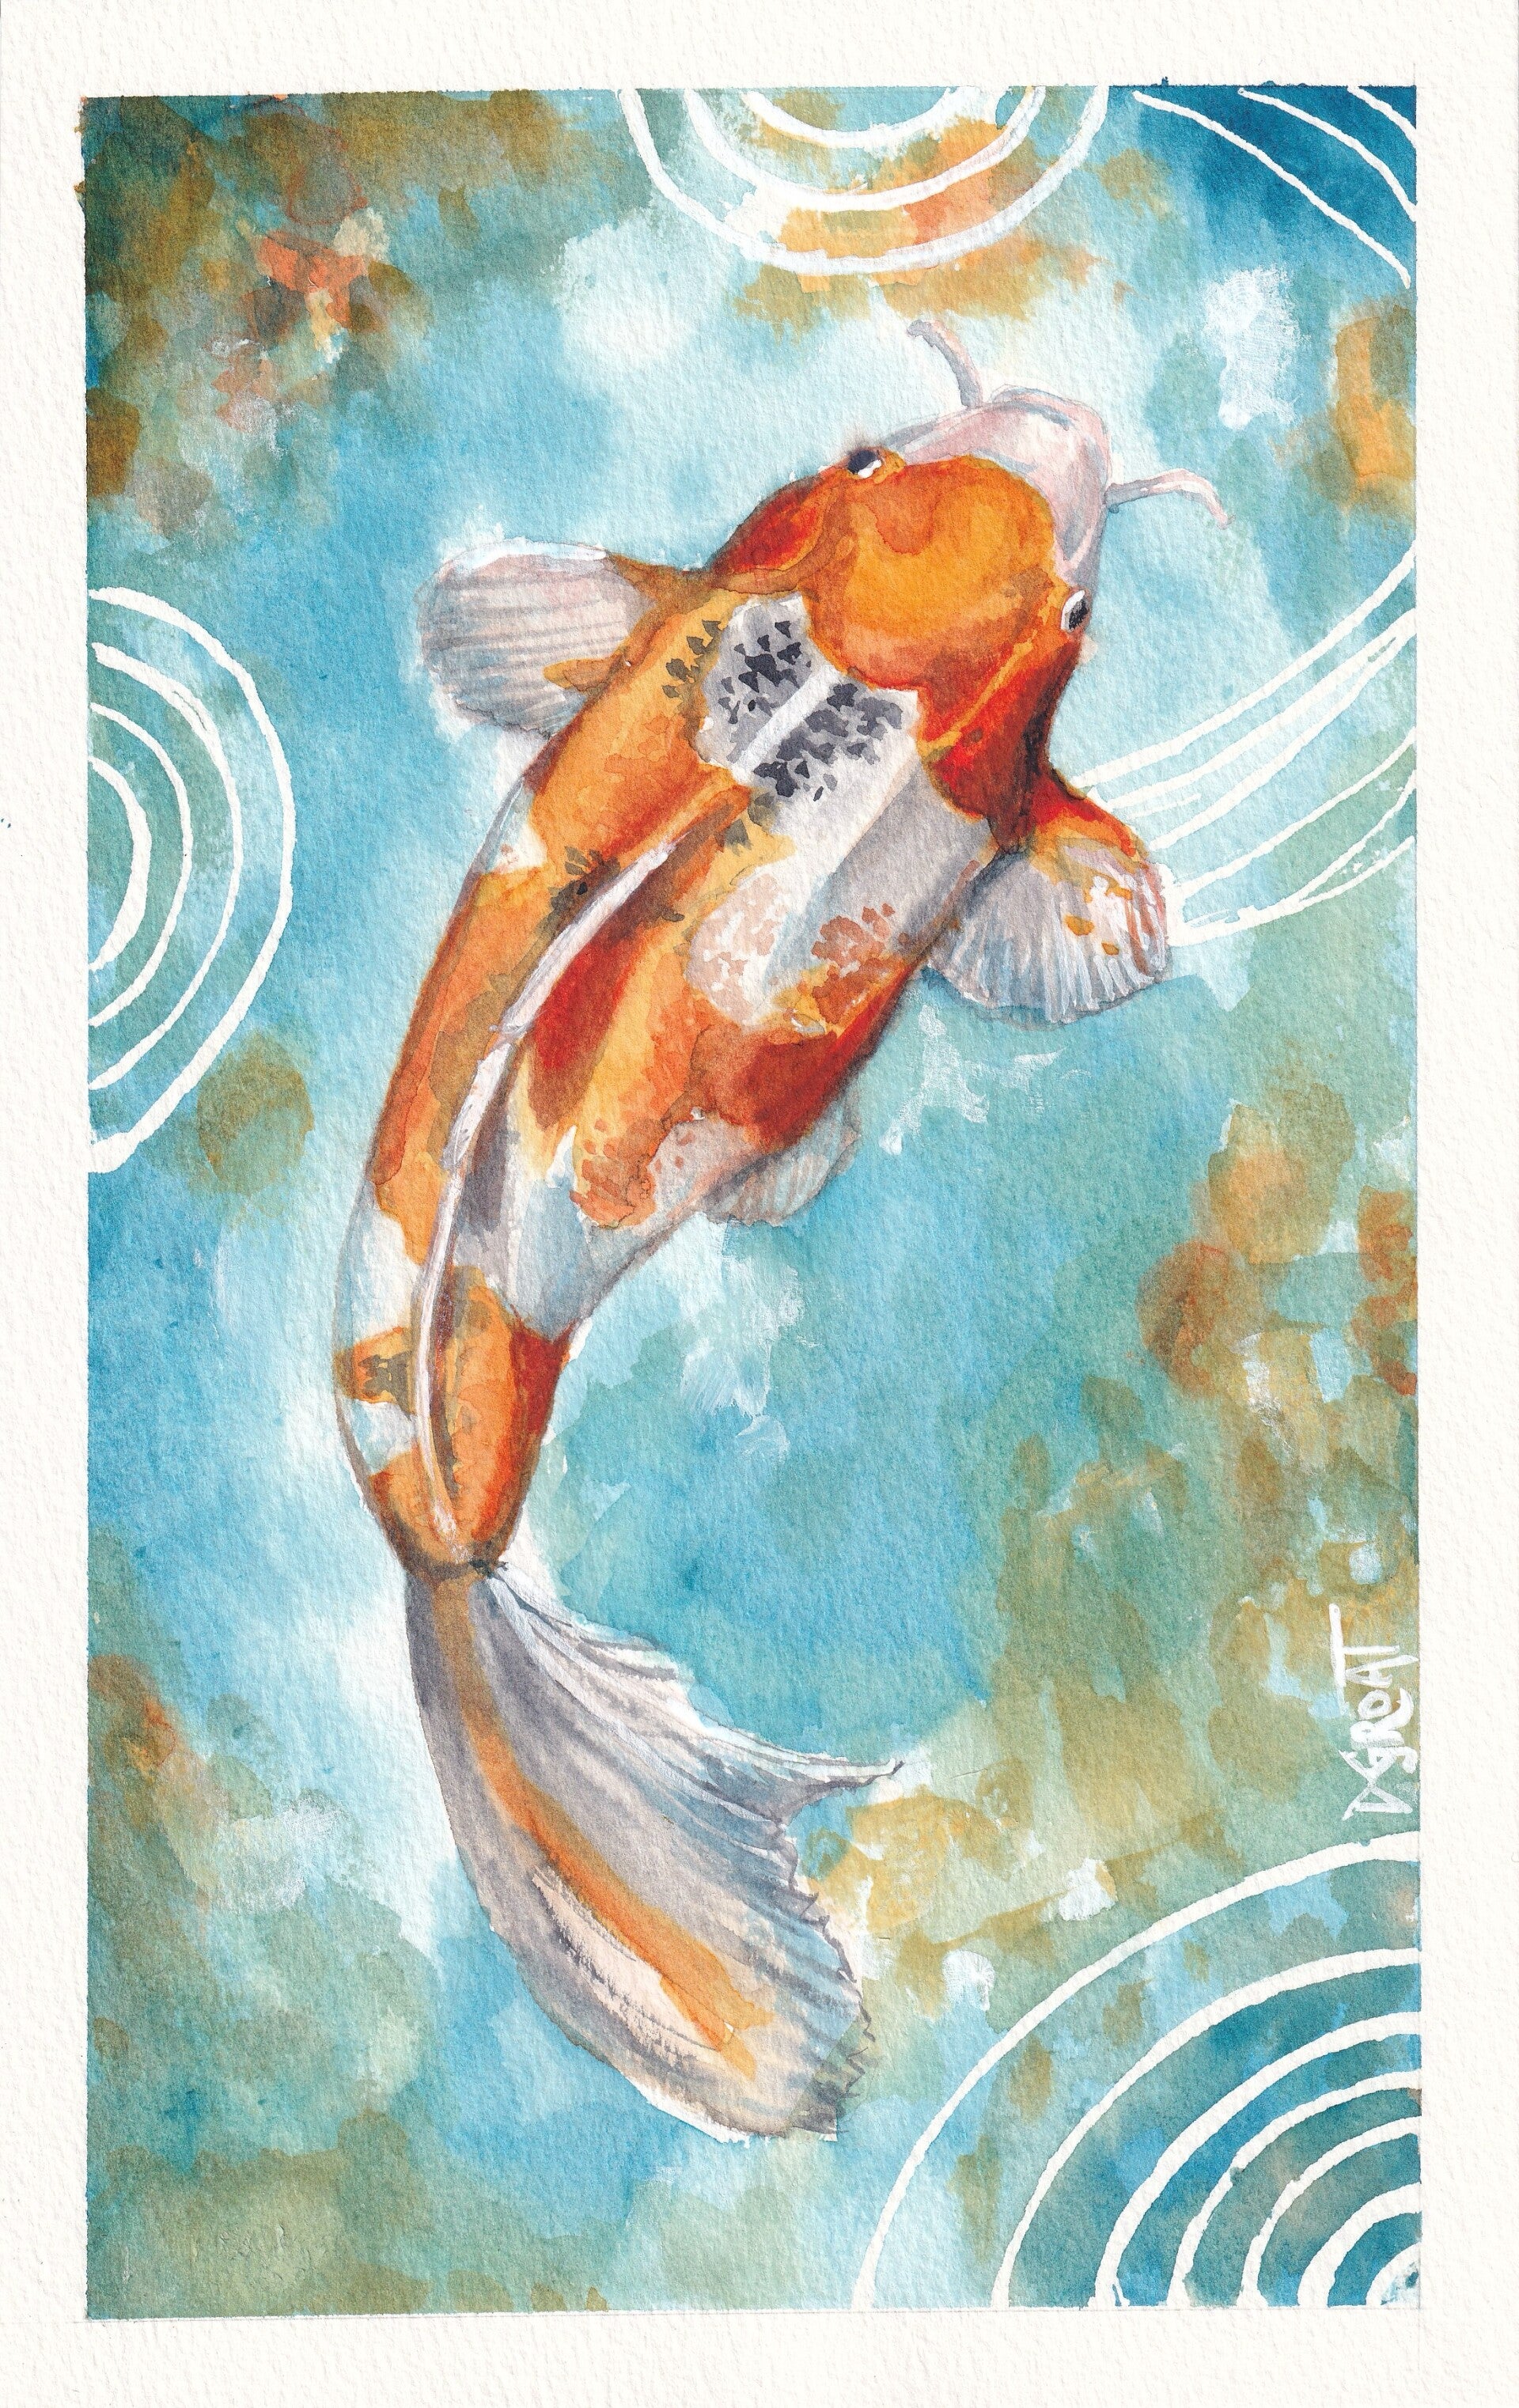
In this journal entry I will be focusing on the watercolour painting titled 'Being Koi' which I painted earlier this year in January.
Inspiration
The inspiration for this one came from childhood visits to the National Museum of Scotland in Chambers Street, Edinburgh where they used to have koi in the main hall, swimming in big stone ponds. I loved the colours and their movement and I like to think I have managed to capture the essence of that in the painting.
Painting - Stage 1 ~ Preparation
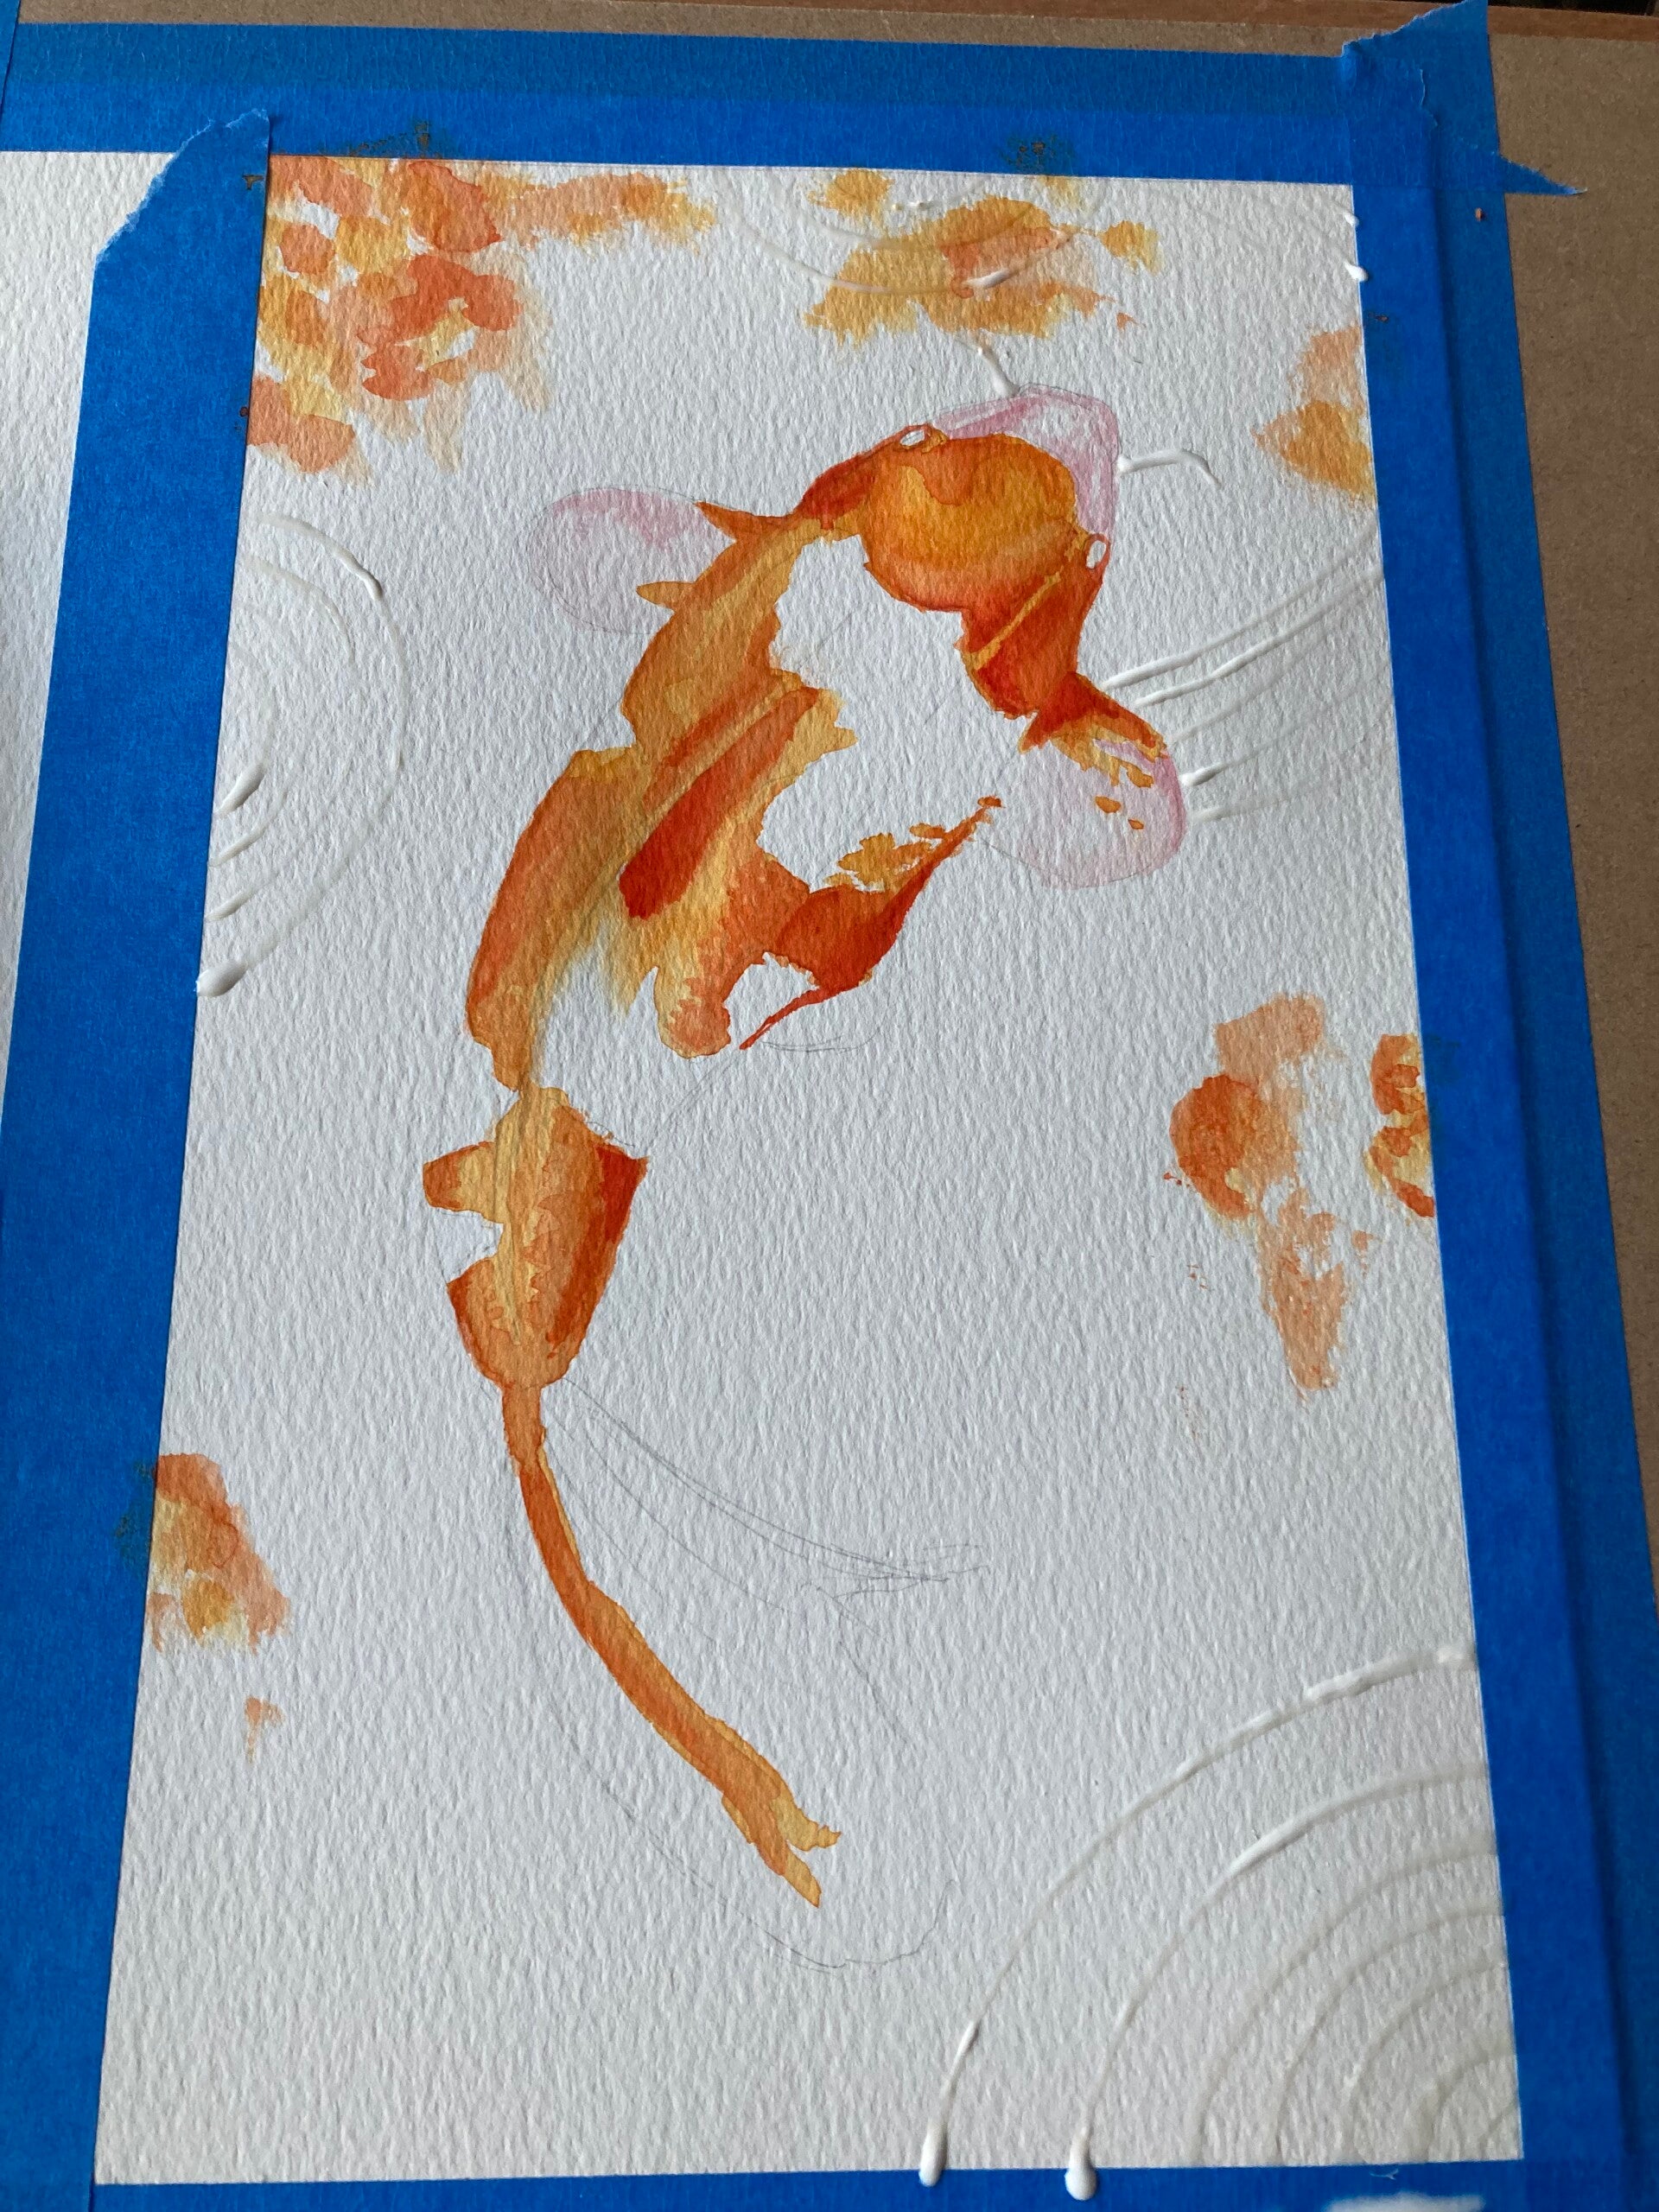
The first stage of the painting was to apply masking tape to create my canvas space and to stop / minimise the paper warping once I started adding the paint.
I sketched out the koi and then added masking fluid to create the swirls you see on the finished piece. Masking fluid is a liquid substance which dries after being applied to the paper and as the name suggests, 'masks' areas of the paper from the applied paint. You can see those as the raised circle lines in the second photo. You need to let the masking fluid dry fully before applying the paint - a hairdryer can be used to speed up the drying process.
At this point I sprayed my watercolour paints with water to start activating them, let them sit a minute or so and then start mixing up my paints on my palette.
Painting - Stage 2 ~ First layers
Watercolour painting is usually completed by adding layers of watercolour paint to a wet surface (wet on wet process) or a dry surface (wet on dry process). Lighter colours typically go on first and colour and depth is built up with additional laters of paint. On this painting, I used a mostly wet on dry process. I used a combination of a size 12 and a size 6 round brush plus a size 2 mop brush.
I started with the koi and began working on the body area and head. I added clean water to orange areas, leaving the lighter / white areas dry so the paint would not spread. I started with lighter orange tones and then dried the painted areas with a hairdryer before moving to the darker tones. Once I was happy with the blended tones I dried the paint with my hairdryer and then started adding some of the oranges to the background. You can see in the photos below where I have painted over the lines covered by the masking fluid. This is where the dried masking fluid prevents the colour being picked up on the paper.
I then moves on to the white areas. In my experience, there aren't many really true whites in nature and so I opted for some subtle blue and pink tones to emphasise the light and dark values .
Painting - Stage 2 ~ Other parts of the koi
I really like the way the tail came out on the painting. I feel it has a fluid feel which is what I would expect on a fish. I applied water to the paper where the tail is (for a bit of wet on wet technique) and then lightly dropped in some subtle grey, blue , pink and orange tones, finishing off the detail with a smaller round brush.
I then used the same small round brush and worked on the detail around the fins, head and the body markings. I really enjoy working with a small brush on the details in a painting. It's at this stage I feel you start to see the subject of the painting start to 'pop'.
Painting - Stage 3 ~ Background
This section can be fun (or, from experience, it can ruin a painting). I applied some clean water to the white areas on the background and then dropped on different tones of blue, orange and green. I tried to focus on darker areas in the corners (to naturally draw the eye to the koi) and around the right hand side of the koi to emulate the shadow it would be casting on the bottom of the pool.
This process was very loose in terms of paint application. After the initial layers had been added, and then dried, it was then about layering wet on dry to try and bring depth and contrast between the colours.
Finishing
The last thing to do, once the paint has dried, was to remove the masking fluid. This is done by gently rubbing over the fluid with your fingers to lift it from the surface of the paper. After that, all that was left was to sign the painting,

Please note :
Product links used on this page are affiliate links.
This means that if you click the link and make a purchase, I may earn a small commission, which I always put toward more art supplies.
Thank you for your support!
Add comment
Comments